
Installing an operating system as a Virtual Machine sometimes is not as trivial as it seems. In this post I am explaining how to install CentOS 5 on the latest VMware Player, which is provided free, on Windows 7. This procedure may also be adapted for other Linux distributions such as Ubuntu or Mint. I will try to explain it in a way so that not so experienced users can follow too.
Step 1 - Prerequisites
- Download CentOS version you want here. I am using version 5.8 in this tutorial and I prefer to download it using the torrent provided for the DVD version. if you go to the directory of the CentOS distribution you will notice that there are 7 ISOs and a DVD. You can download 7 CDs or just one DVD! Your choice! ;)
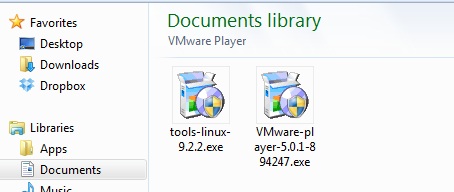
- Download VMware Player from their website. I am using version 5.0.1.
- Download VMware tools here, for your version of VMware player. As we are going to install CentOS we need to download tools-linux-9.2.2.exe.tar which is zipped in a tar file. You can use 7zip to extract the contents or any other tool of your choice. VMware tools is a necessary toolkit that installs different drivers and configures a lot of things without moving a finger! (or in this case a cursor)

1. First install VMware Player by double clicking on the executable.
2. When finished, install VMware tools. This will not show any window dialog, but it installs something like a patch to the Player. If Player is already running, close it and restart it.
Step 2 - Setting up the hardware
1. Launch VMware Player if not already started. Click on Create a New Virtual Machine.

2. On the next screen choose Installer disc image file (iso), click Browse and select CentOS iso image from the location you have downloaded it. VMPlayer detects automaticaly that CentOS is about to be installed, and this is good because you don't have to do much! This feature is called Easy Install. Click Next.

3. On the next window fill the details as preferred. I used the following:
Full name: User1, Username: user1, Password of your choice.
Click Next
4. Complete the Virtual Machine Name to CentOS5 and enter an installation location of your choice. Click Next.
5. On the next window leave maximum size as suggested, and select Split virtual disk into multiple files. Click Next.
6. On the next window the overview of the hardware is shown. Depending on the specifications of your computer, the RAM is correspondingly selected. The default for my 4GB laptop was 1GB. If you want to add more memory click Customize Hardware -> Memory -> Set size, as shown in the image below.

7. Select to Power on the virtual machine after finishing the setup. Click Finish.
8. The installation starts automatically, takes some time, grab a KitKat!

DONE! If your screen resolution on the VM is quite large this probably means that VMtools were installed correctly.

In the case that not or you want to install VMware Tools anyway, proceed to Step 3. Otherwise skip to Step 4.
Step 3 - Installing VMware Tools
1. In a running CentOS instance select on the VMware Player window: Player-> Manage -> (Re)Install VMWare Tools.

This will mount the Vmware Tools on CentOS and the icon appears on the desktop.

2. Open up a terminal within the Virtual Machine from Applications -> Accessories -> Terminal.
3. Go to the Vmware tools mounted directory by typing: cd /media/Vmware Tools
4. Copy the tar file to the home directory: cp *.tar.gz ~
5. Go to the home directory: cd ~
6. Extract the contents of the file: tar xvf *.tar.gz
7. Go into the folder created from extracting: cd vmware-tools-distrib
8. Become a super user: su
9. Begin the installation of the tools: ./vm-install.pl
10. On the followed 8 questions about were to install couple of things just press enter when asked.
11. VMWare Filesystem Sync driver? -> no (enter)
12. Host-guest file system? -> YES (enter)
13. Drag and drop? -> Definitely YES (enter)
14. Automatic kernel modules -> no (enter)
15. Thinprint -> yes (enter)
16. Change starting screen display size? -> no (enter)
17. DONE! Shutdown the instance: System -> Shut down -> Shutdown
Step 4 - Configure Shared Folders
VMware gives you the option to set a shared folder between the Host (laptop/PC) and the Virtual Machine (CentOS). Whenever you put something in that folder it is automatically added in the folder in Windows. (Yeah... this is what sharing is all about! :p )
1. From the main VMware Player window, select CentOS5 from the list on the left and then Edit virtual machine settings -> Options - > Shared Folders -> Always enabled -> Add

2. Click Next and choose the host directory you want to share between platforms. I created a folder called SharedFolder. Click Next.
3. Select Enable this share -> Finish -> OK
4. Start CentOS5.
5. To view the folder just created and shared go to: Computer -> FileSystem -> mnt -> hgfs -> SharedFolder. Use this for any further sharing from the Virtual Machine.
If you wish, you can delete vmware-tools-distrib folder we extracted earlier, from the home directory.
Set to full screen and ENJOY!
For any misunderstandings or more details on something use the comments below.
No comments:
Post a Comment